
Allowlisting Note: Are you having issues with accessing our simulated phishing websites? Check out our website allowlisting support article.
Important Note: All links to our managed phishing websites are for one-time use. i.e. we allow users to access the simulated phishing website but then expire the link within 15-30 minutes so future attempts to access the webpage will lead to a 404 error page. This is designed to replicate the same masquerading techniques that real-world threat actors use.
This introduction will take you through every step involved in the creation and use of phishing website templates.
- What is a phishing website template?
- Website functionality deep-dive
- Create a custom phishing website (Enterprise)
- Generate a custom phishing website with AI (Enterprise)
- Bring your own phishing website
- What Information Is Captured On CanIPhish Phishing Websites?
1. What is a phishing website template?
A phishing website template is the landing page a target goes to if they click a phishing link embedded within a phishing email. At this stage, the target has already fallen for the phishing campaign, however use of the phishing website adds an additional layer of testing to see if the target would be willing to give up sensitive information in the form of user credentials.
2. Website functionality deep-dive
-
Template Page Options:
- New Phishing Website: Leads to a modal to choose from creating a template from scratch, or using AI to generate a phishing website (Enterprise)
- View Website (Magnifying Glass): Opens the website in a new web browser tab for viewing purposes.
- Update Template: Provides the ability to view and update the back-end configuration used to create the template (i.e. description and website url).
- Duplicate Template: Allows for duplication of the template. Useful for editing the template while keeping the original intact.
- Delete Template: Provides the ability to delete a template. CanIPhish templates will reappear as default if deleted.
3. Create a custom phishing website (Enterprise)
Enterprise customers can use the built-in HTML editor to create custom simulated phishing websites directly in the platform. This is useful when you need a phishing landing page that matches a specific scenario, brand style, or training objective, with CanIPhish handling the hosted phishing website infrastructure and interaction tracking code.
Template Creation Options:
- Website Name: The internal name used to identify the phishing website template inside the platform.
-
Domain Type: Determines how the phishing website will be hosted.
- Managed Domain (Recommended): Hosts the phishing website using a domain managed by the CanIPhish platform. This is recommended when you want CanIPhish to manage the hosting infrastructure.
- Bring Your Own (Advanced): Allows you to host your own phishing website infrastructure. This is useful when you need to use your own domain or external hosting setup.
- Website Domain: Defines the domain used for the phishing website URL. When using a managed domain, you can enter the desired subdomain and select one of the available managed domains from the dropdown list.
-
Webpage Type: Determines how the phishing webpage itself will be created.
- Managed Webpage: Lets you choose from the existing CanIPhish library of phishing webpages.
- Custom Webpage: Lets you create your own phishing webpage using the built-in HTML editor.
-
Custom HTML: The area where you add the HTML and CSS for your custom phishing website. JavaScript is restricted for security reasons. Any
<script>tags or inline JavaScript are stripped when the template is saved, with only approved event handlers allowed.- HTML Editor: The main editing view where you can write or paste your custom HTML.
- Preview: Displays a preview of the phishing website so you can check how the page will appear to users before saving.
- Split: Shows the editor and preview side by side, making it easier to build and review the webpage at the same time.
-
Popout: Opens the editor in a larger separate view, which can make editing longer HTML templates easier.
Note: Only HTML and CSS is allowed — any
<script>tags or inline JavaScript are stripped on save. The only event handlers allowed areonclickandonkeydownand they must invoke thesignIn()function, which triggers the employee compromise event. The supporting JavaScript poweringsignIn()(along with payload-interaction tracking) is automatically injected into the page on load — you don't need to add it yourself.
4. Generate a custom phishing website with AI (Enterprise)
The AI-Powered Website Generation tool allows Enterprise customers to generate a complete simulated phishing website based on written instructions. Instead of manually writing the HTML yourself, you describe the website you want to create and the platform will generate the webpage for you. The generated website automatically includes the required sign-in tracking logic.
Watch the AI Website Generator in action See a quick walkthrough of how AI can generate a phishing website from a simple prompt.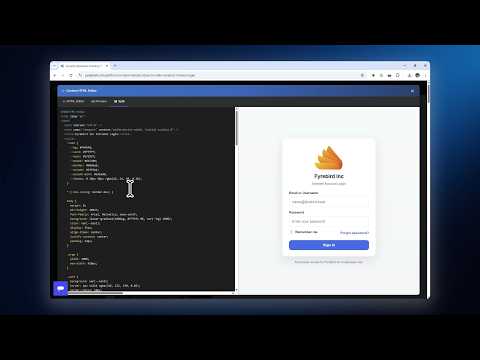
AI-Powered Website Generation Options:
- Description (AI Prompt): The main instruction field used to describe the phishing website you want to generate. You can describe the target service, page type, layout, branding style, colours, tone, and any specific page content you want included.
- Clone URL: An optional URL that helps guide the AI when generating the website. When provided, the AI will attempt to mimic the styling, structure, and general page content of the referenced website.
- Example Prompts: Provides prompt ideas that show the types of phishing websites you can generate. These examples can be used as a starting point when creating common scenarios.
-
Advanced Options: Expands additional fields that can be used to guide the generated website more closely.
- Reference Image: An optional image that helps guide the AI when creating the website.
- Company Logo: An optional logo that will be injected into the generated website. This is helpful when creating a branded phishing website that uses a company logo or other familiar visual identity.
-
Generate: Creates the phishing website based on the information provided. Once generated, the website can be reviewed and adjusted before it is saved as a phishing website template.
Important: Safety controls apply to all AI-generated websites, whether they are created from a written prompt, a Clone URL, a reference image, or a combination of these options. CanIPhish may block requests that attempt to impersonate government entities, reproduce protected services, include potentially malicious scripts, or generate other restricted content.
5. Bring your own phishing website
The CanIPhish platform supports the use of third-party phishing websites, should one of our hosted websites not be sufficient for your needs. In the event you do use your own website, you need to perform the following actions to ensure that CanIPhish can track user movements on who landed on the website and who had their sensitive information stolen.
3.1. Add the following Javascript/JQuery functions and scripts to the bottom of your website. Or see here for the GitHub project.
Note: Replace the REDIRECT_TO variable with the learning website you want users to be directed to once they fall victim to credential harvesting.
<script src="https://code.jquery.com/jquery-3.6.0.min.js"></script>
<script type="text/javascript">
    const REDIRECT_TO = 'https://learning.authwebmail.com/index'; // The destination URL once data has been submitted

    var responseEndpoint = "https://vmb1fx4bod.execute-api.ap-southeast-2.amazonaws.com/interaction-capture";
    var signInCalled = false;
    function signIn() {
        uri = responseEndpoint + document.location.search + "&webClick=true&callback=myFunction";
        console.log(uri);
        if (signInCalled === false) {
            $.ajax({
                url: uri,
                type: 'GET',
                dataType: 'jsonp',
                complete: function (response) {
                    console.log(response); // server response
                    redirectPage();
                }
            });
            signInCalled = true;
        }
    }

    function redirectPage() {
        //HARDCODED REDIRECTION SPECIFIED USING THE REDIRECT_TO VARIABLE - COMMENT OUT IF USING CAMPAIGN REDIRECTION
window.location.href = REDIRECT_TO;

//UNCOMMENT IF YOU WANT TO USE REDIRECTION LOGIC SPECIFIED WITHIN PHISHING CAMPAIGNS
//var redirectUri = "../index" + document.location.search;
//const urlParams = new URLSearchParams(document.location.search);
//const myParam = urlParams.get('t');
//var decodedString = atob(myParam);
//var parsedQuery = parseQuery(decodedString);
//var decodedEducation = parsedQuery.eType;
//var decodedURL = parsedQuery.eURL;
//if (decodedEducation == "CanIPhish") {
// redirectUri = "../index" + document.location.search;
//} else if (decodedEducation == "BYO") {
// if (decodedURL.indexOf("http://") == 0 || decodedURL.indexOf("https://") == 0) {
// redirectUri = decodedURL;
// } else {
// redirectUri = "https://" + decodedURL;
// }
//} else if (decodedEducation == "NONE") {
// redirectUri = REDIRECT_TO;
//} else {
// console.log(`Got decodedEducation: ${decodedEducation} ... and redirectUri: ${redirectUri}`);
//}
//window.location.href = redirectUri;
    }

    function parseQuery(queryString) {
        var query = {};
        var pairs = (queryString[0] === '?' ? queryString.substr(1) : queryString).split('&');
        for (var i = 0; i < pairs.length; i++) {
            var pair = pairs[i].split('=');
            query[decodeURIComponent(pair[0])] = decodeURIComponent(pair[1] || '');
        }
        return query;
    }
</script>
<script>
    $(document).ready(function () {
        uri = responseEndpoint + document.location.search;
        console.log(uri);

        $.ajax({
            url: uri,
            type: 'GET',
            dataType: 'jsonp',
            success: function (response) {
                console.log(response); // server response
            },
            error: function (response) {
                console.error("Got error during first callback: " + response);
            }
        });
    });
</script>
3.2. Add an event listener to the sensitive data input (e.g. password input) that executes 'onkeydown' which then calls the 'signIn()' function. Similar to the below example:
<input onkeydown="signIn()" type="password" id="session_password-login" class="password" name="session_password" placeholder="Password">
6. What Information Is Captured On CanIPhish Phishing Websites?
No usernames, email addresses, or passwords are captured on any CanIPhish managed phishing websites. CanIPhish simply captures that an interaction occurred. There are two interactions that can be recorded:
- Page Load Interaction: This interaction occurs automatically when the phishing page is loaded. This interaction is used to record the "Payload Interaction" statistic within phishing campaigns.
- Credential Entered Interaction: This interaction occurs either on a username submission or when a character is entered into the password field on any phishing page. This interaction is used to record the "Employee Compromised" statistic within phishing campaigns. At no point is any of the information provided in username/email address or password fields recorded by CanIPhish. This information never leaves the client's browser, and an immediate redirect to an education page is performed after this interaction is recorded.
When a page load or credential entered interaction is recorded, CanIPhish will also record the Source IP and User Agent String of the browser that performed that interaction. This information is used for campaign evidence purposes in case an employee disputes performing the interaction.
Comments
0 comments
Please sign in to leave a comment.